For those of you who crochet, check out my newest pattern! Wavy Shoulder Wrap with BONUS instructions for a Swervy Scarf. It will be on sale until midnight EST 12/16/13 for $1.30 in celebration of my daughter’s 13th birthday! No coupon code is necessary, the discount comes off during checkout.

New pattern release/birthday sale!
13 Dec 2013 Leave a comment
in Christmas gift ideas, Crafts, Crochet Patterns, DIY, Pattern Sales Tags: crochet pattern, crochet pattern sale, crochet scarf pattern, crochet shoulder wrap pattern
HaPpy Birthday Dr. Seuss
01 Mar 2013 Leave a comment
in Crafts, Free Patterns Tags: Dr. Seuss

http://m.facebook.com/photo.php?fbid=617701441579716&id=292307287452468&set=a.292333717449825.88679.292307287452468&relevant_count=1&refid=17 Need a quick project for today? Why not make some Dr. Seuss bookmarks for the little ones!? 🙂 Here is a link to one of my Facebook pages where you can find a bit more detail!
Sharpie Mugs!
13 Feb 2013 4 Comments
in Crafts Tags: craft, crafting, sharpie mugs, Valentine's day gift

I have looked over many blogs about this and received tips from fans of “Tara Creates” my craft community page on Facebook. So with very little planning and next to no supplies, I decided to give it a go 😉 Here’s to hoping this works out, otherwise, all I have for hubby’s Vday gift is a tube of green apple chapstick. Lol.
Materials: 1 ceramic mug that I got from Walmart for $1.75 yesterday
1 black Sharpie paint marker that to my horror, I located in my daughter’s jacket pocket the other day (I thought it was gone forever)
1 red regular Sharpie marker (because the only other Paint one I have is neon green)
A bit of tape
A piece of notebook paper
What I did: Preheated the oven to 350 degrees. At the last minute, I finally decided what I would write on the mug.. a fragment of a Pink Floyd song “…swimming in a fishbowl, year after year.” I cut a strip of notebook paper and made sure it would fit on the area intended for the quote. I wrote the quote on the paper using the red sharpie, because I was unsure if there would be enough in the paint one after my daughter had hijacked it. I taped the paper to the top of the cup directly above the area for the intended lettering. Then I used the paint marker and wrote the quote. Next, I practiced the fish and hearts a few times on paper before adding them. Lastly, I freehanded a little note opposite the fish then stuck the cup in the oven on a baking sheet and set the timer for 30 minutes. Subsequently, the timer just dinged! Now I will open the oven and let it cool until all the heat is out.. hopefully before hubby gets home from work it will be cool enough to close so he doesn’t look in there and see it before tomorrow! 🙂 I can’t think of anywhere else to let it cool, and I don’t need the oven tonight, so fingers crossed, this should work! Lol 🙂
**UPDATE**
After 3 days of use and handwashing, the lettering has a bit of scratching. I am so disappointed!! I will continue to search for an easy way to decorate mugs, because I had all sorts of future plans for this project! Keep an eye out for my progress… :D”
Angle Birds, Oh Boy!!
28 Jan 2013 Leave a comment
in Christmas gift ideas, Crafts, Crochet Patterns, DIY, Free Patterns, Pattern Sales, Photography, Yarnwork Tags: angry birds, angry birds crochet hat, crochet hat, free crochet pattern

My nephew just turned 3, and he calls them Angle Birds.. excitedly I might add. 😉
I wanted to make a hat for him, so I will share how I made it, so that you can give it a whirl too! 🙂
I made a plain red hdc beanie in the desired size, added a pom to the top and made the face as follows.
Materials Needed: E hook, G hook, WW black, white and yellow yarn and a bit of thin black yarn or 2 tiny buttons
Eyes: Make 2; With G hook and white WW yarn ch 2. 8 hdc in 2nd ch from hook, join. Next round; *2 hdc in each st* around, join. (16) Edging; change to black yarn *1 sc in 1st st, 2 sc in 2nd st* repeat around. (24)
Beak: Using yellow WW yarn and G hook. ch 2, hdc in 2nd ch from hook, turn ch 1. 2 hdc in only st, turn ch 1, 2 hdc in 1st st, 1 hdc in each of he next 3 sts, turn ch 1. hdc2tog, hdc in next st, hdc2tog, turn ch 1. hdc2tog, hdc in next st, turn, ch 1. hdc2tog. This should make an oblong diamond shape. Edging; Now switch to black and sc around edge, with 2 sc in each of the 4 points.
Eyebrow: Ch 22, dc in 4th ch from hook, dc in each of the
next 2 sts, hdc in each of the next 3, sc in each of the next
3, slip stitch in each of the next 2, sc in each of the next 3,
hdc in each of the next 3, dc in each of the next 3.
For the pupils of the eyes I used thin black yarn and a size e
hook. Make 2. (You could substitute small buttons instead) Ch 2, 5 sc in 2nd ch from hook and then join.
Sew all of the pieces onto the hat in the same way as the picture shows.
HaPpy Hooking!!
~Tara~
“A cap in a snap” pattern
20 Dec 2012 Leave a comment
in Christmas gift ideas, Crafts, Crochet Patterns, DIY, Free Patterns, Pattern Sales, Yarnwork Tags: adult unisex crochet hat pattern, free chunky yarn crochet hat pattern, free crochet hat pattern, lion brand hometown usa yarn hat, n hook 10 mm hook
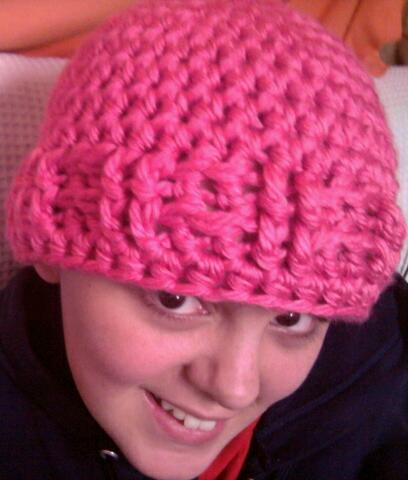
Materials: Lion Brand Hometown USA 1 skein N 10 mm hook Abbreviations: Hdc -half double crochet, st(s)-stitche(s), fpdc-front post double crochet, bpdc-back post double crochet
Gauge: Work as in rounds 1 and 2 = 3 1/4″ across.
Instructions: Round 1: Make a magic circle, ch 1 and hdc 8 times in circle. Pull to close and join with a slip stitch.(8) Round 2: Do not ch at beginning of rounds here and throughout. 2 hdc in each of the 8 sts. Join with slip stitch.(16) Round 3: Hdc in 1st stitch, *2 hdc in next st, hdc in next st,* repeat from * to * 6 more times, 2 hdc in last stitch. Join with slip stitch. (24) Round 4: Hdc in each of the1st 2 sts, *2 hdc in next st, hdc in each of the next 2 sts,* repeat from *to* 6 more times, 2 hdc in last stitch. Join with slip stitch. (32) Round 5: Hdc in each of the 1st 3 sts, *2 hdc in next st, hdc in each of the next 2 sts. Join with slip stitch. (40) Round 6-9: Hdc in each stitch. Join with slip stitch. (40) Round 10-11: Fpdc in the 1st 2 sts, *Bpdc in each of the next 2 sts, Fpdc in each of the next 2 sts,* Repeat from * to * 8 more times, Bpdc in each of the next 2 sts. Join with slip stitch. (40) Round 12: Hdc in each stitch. Join with slip stitch. Fasten off. (40) Hat size: 7 1/2″ x 21″
